Our Mailchimp Integration plugin keeps your Mailchimp audience and your CubeCart store in step automatically, in both directions, and publishes the shop data that Mailchimp's automations and revenue reporting actually run on. This article covers what it does, how to set it up, and what each screen is for.
What it keeps in step
- Newsletter subscribers, both ways. Somebody subscribing in your store is added to your Mailchimp audience, and an unsubscribe, cleaned address or email change at Mailchimp is written back to your store, so the two lists cannot drift apart.
- Only people who opted in. Creating an account is not treated as consent. If CubeCart's double opt-in is on, nothing is sent until the shopper confirms.
- Customers with their buying history. First and last name, phone, country, how many orders they have placed and what they have spent in total, all available in Mailchimp as merge fields you can segment on.
- Products, orders and live baskets, which is what abandoned basket recovery, product retargeting and purchase automations need. The basket is removed from Mailchimp as soon as the order is placed.
- Your discount codes. Store coupons are published to Mailchimp as promo codes, so a campaign can carry a working discount and Mailchimp can report the revenue each one earns.
- Tags for the customer group and whether somebody has ordered, which is what Mailchimp segments and automations are easiest to build on.
Before you start
- A Mailchimp account with at least one audience. The free tier works.
- Your Mailchimp API key: in Mailchimp, click your avatar, then Account & billing, Extras, API keys.
- CubeCart 6.6.0 or later, with the ionCube Loader enabled.
- Your licence key from our client area, under My Products & Services.
If CubeCart's own free Mailchimp plugin is installed, our plugin switches it off the first time you open its settings and tells you it has done so. Both answer the same events, so with both enabled every sign-up would reach Mailchimp twice. Nothing is deleted and you can re-enable it under Manage Extensions.
1. Enter your API key and licence key
Open the plugin from Manage Extensions, or from the Havenswift section of the admin menu. On the General tab paste the API key and the licence key, then save. The datacenter is read from the key itself, so there is nothing else to copy across.
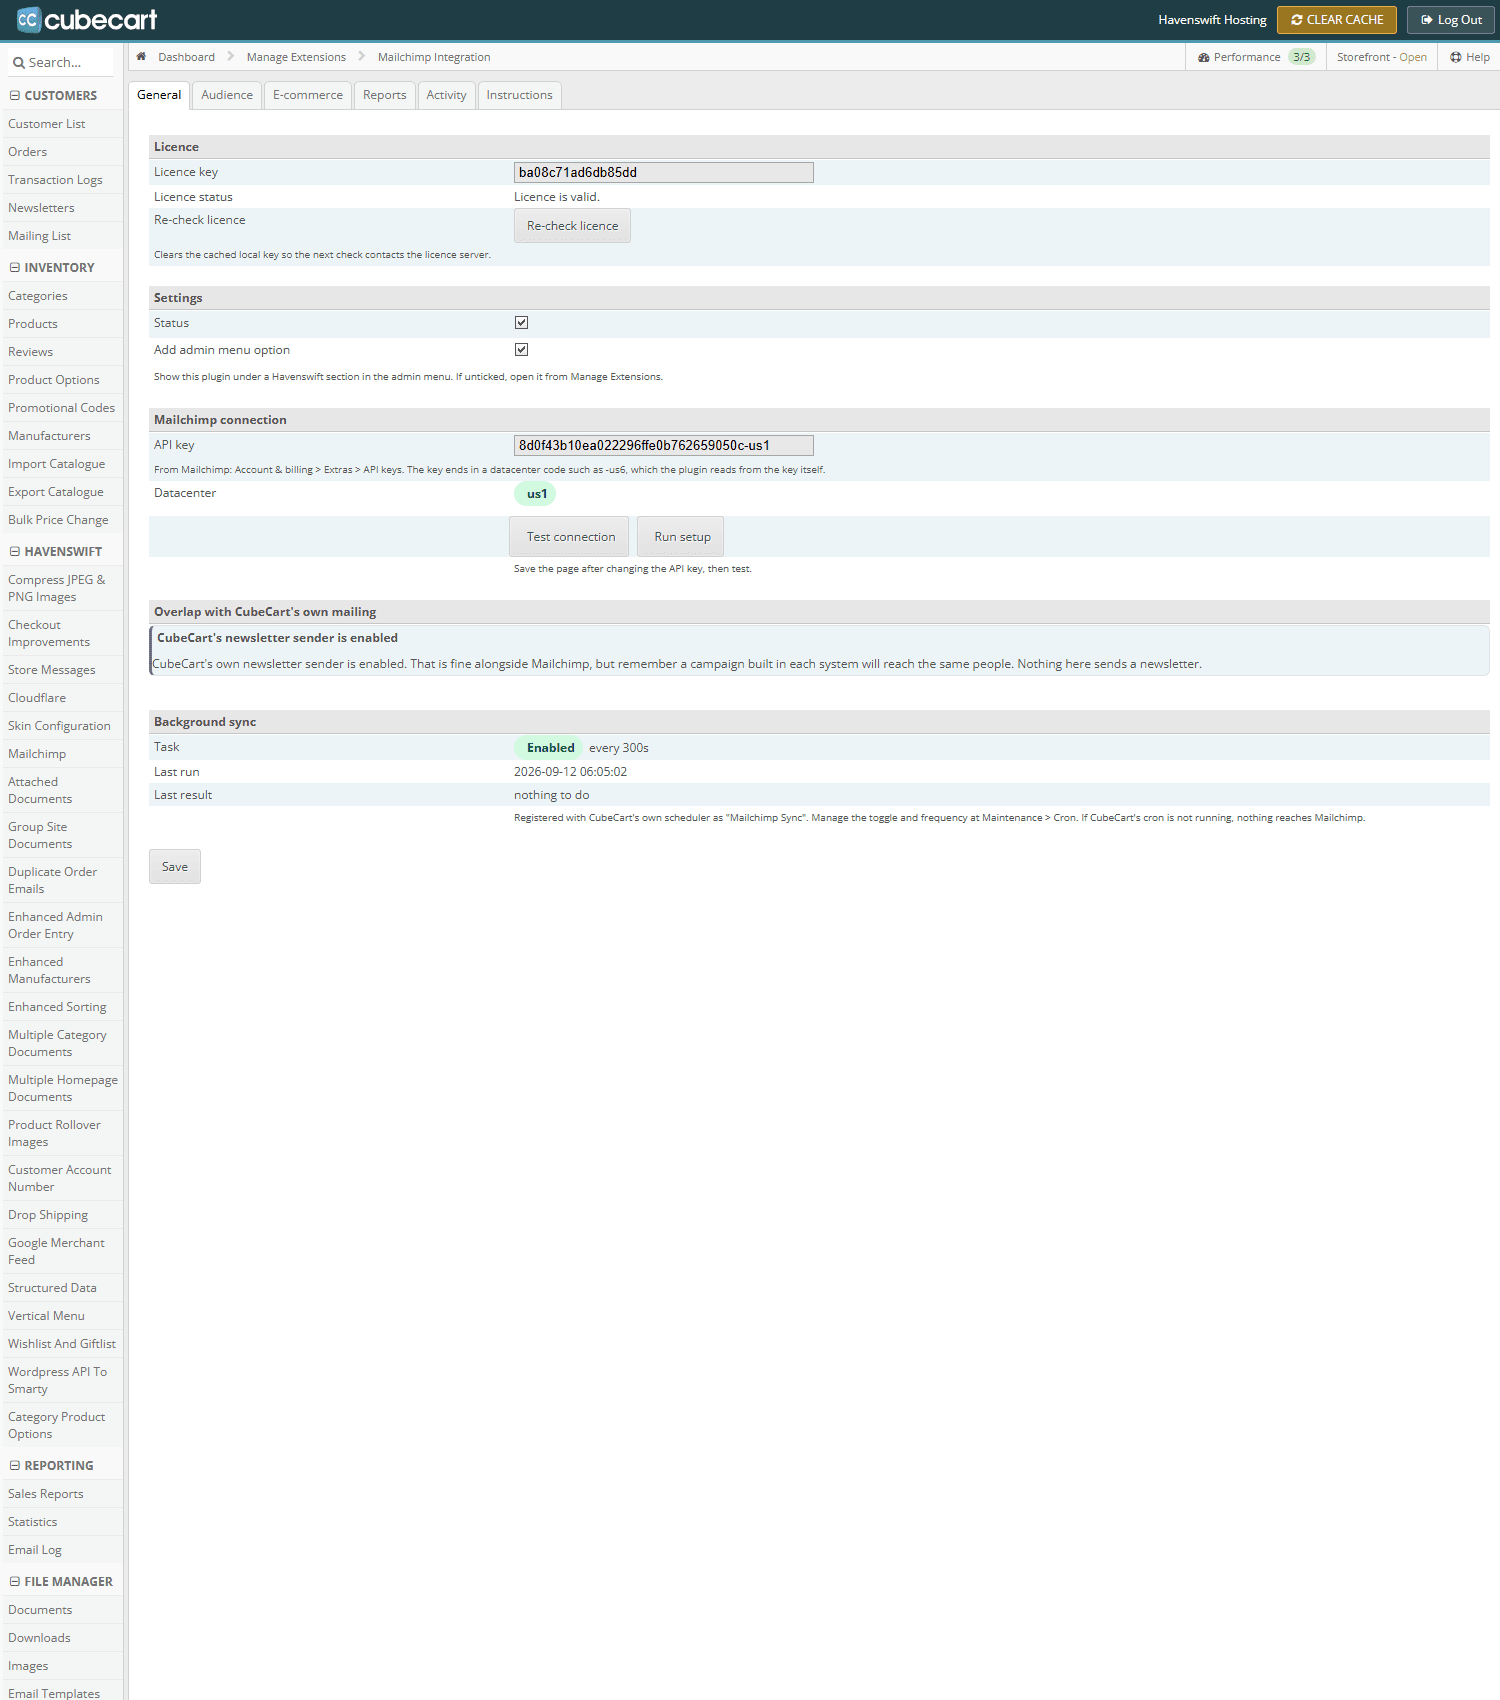
Use Test connection to confirm the key works. It is a read-only call and sends nothing.
2. Choose your audience
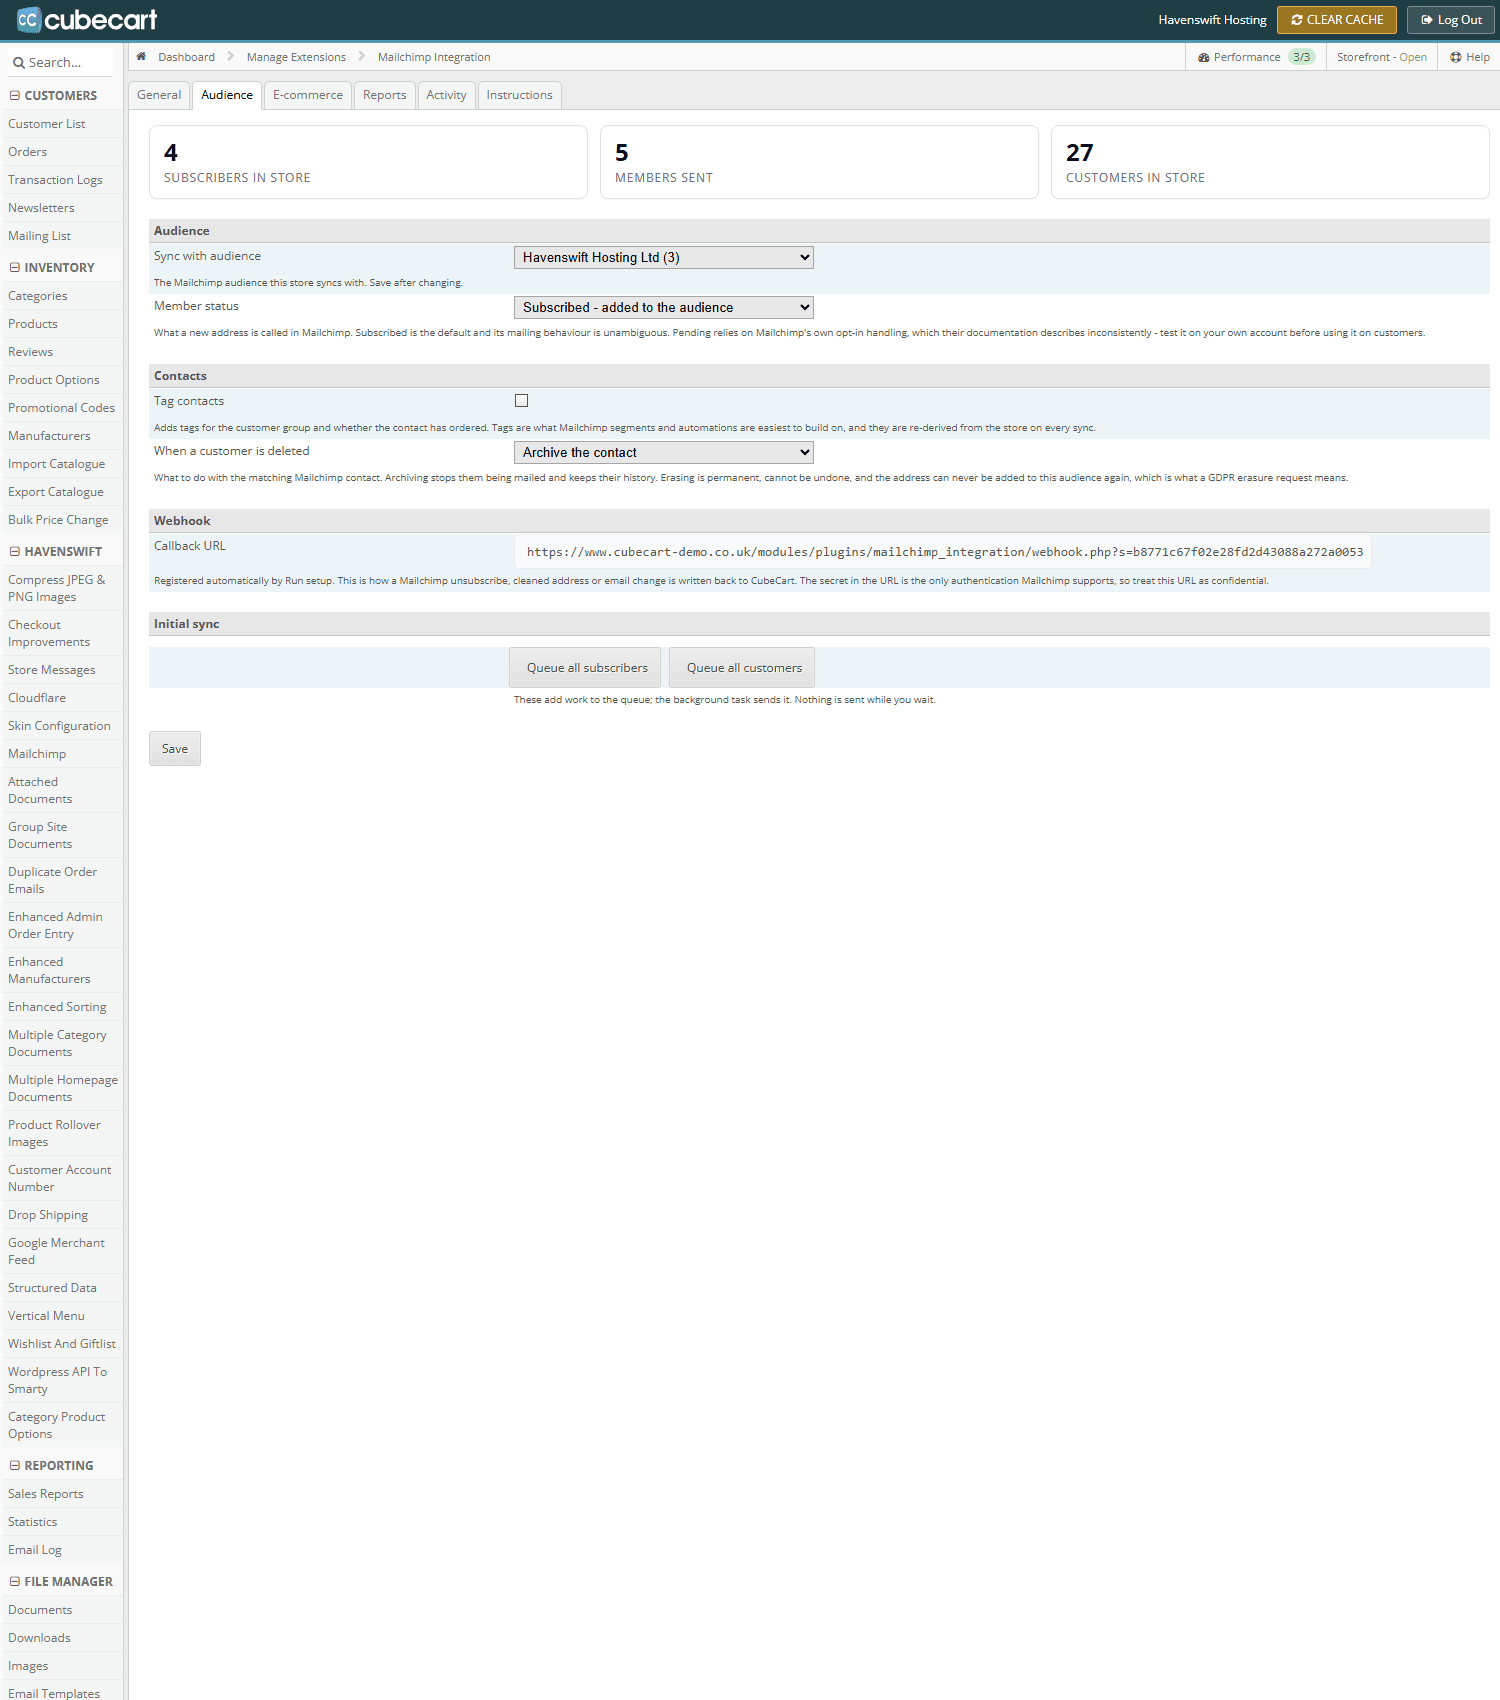
On the Audience tab, pick the audience this store syncs with and save. This is also where you choose the status new contacts are given, whether contacts are tagged, and what should happen to a contact when you delete the customer in your store.
3. Run setup
Still on the General tab, use Run setup. In one step it creates the merge fields in Mailchimp, creates the e-commerce store, registers the callback that carries changes back from Mailchimp, and fetches your site tracking snippet. There is nothing to copy and paste between the two systems.
4. Turn it on
Set Status to enabled and save. From that point, sign-ups, orders, product changes and basket activity are queued as they happen.
5. Send what you already have
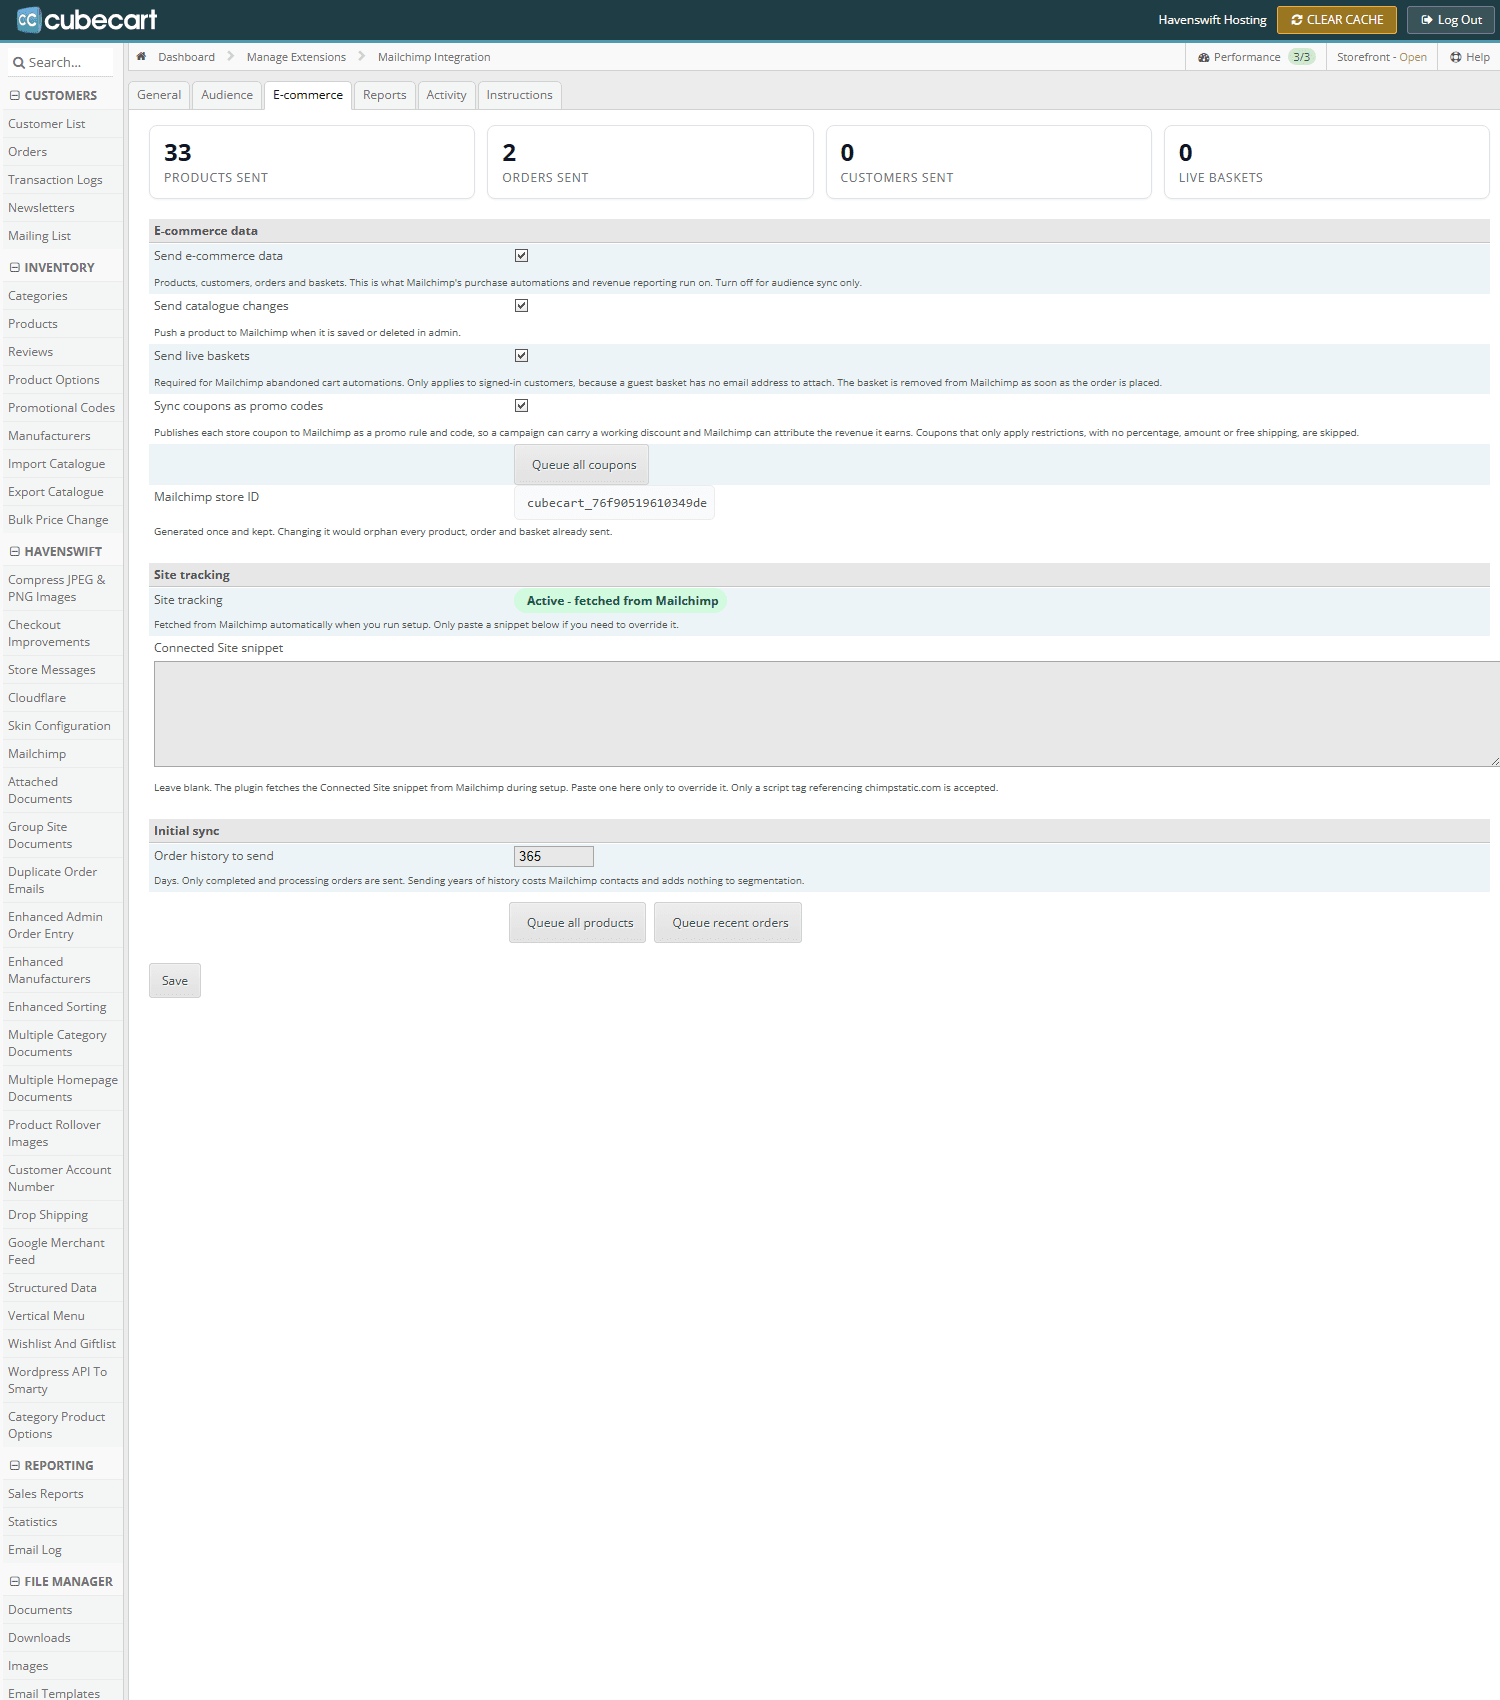
A new install starts with an empty Mailchimp store, so use the queue buttons to send your existing data: subscribers and customers on the Audience tab, products, orders and coupons on the E-commerce tab. Order history is limited to the number of days you set, because sending years of history costs Mailchimp contacts and adds nothing to segmentation.
Discount codes in campaigns
With Sync coupons as promo codes on, every coupon in your store is published to Mailchimp as a promo rule and its code. Adding, editing, enabling, disabling and deleting a coupon all follow automatically, and Queue all coupons sends the ones you already have. A coupon that only applies restrictions, with no percentage, no fixed amount and no free shipping, is skipped, because Mailchimp has no way to express it. An expired or disabled coupon is sent as disabled rather than removed, so campaigns you have already written keep their history.
Tags
Turn on Tag contacts and each contact carries their customer group, along with whether they have ordered or only registered. Tags are worked out from your store every time a contact is synced, so they cannot go stale.
Deleting a customer, and GDPR
When you delete a customer in CubeCart, the matching Mailchimp contact is archived by default: they stop being mailed and stop counting towards your Mailchimp plan, but their history is kept if they ever come back. If you are acting on a GDPR erasure request, set When a customer is deleted to erase the contact permanently. That cannot be undone, and the same address can never be added to that audience again.
Changed addresses and deleted orders
If a customer changes their email address in your store, the existing Mailchimp contact is moved to the new address rather than a second contact being created while the old one carries on receiving campaigns. If you delete an order, it is removed from Mailchimp as well, so campaign revenue stops counting an order you no longer have.
Campaign reporting
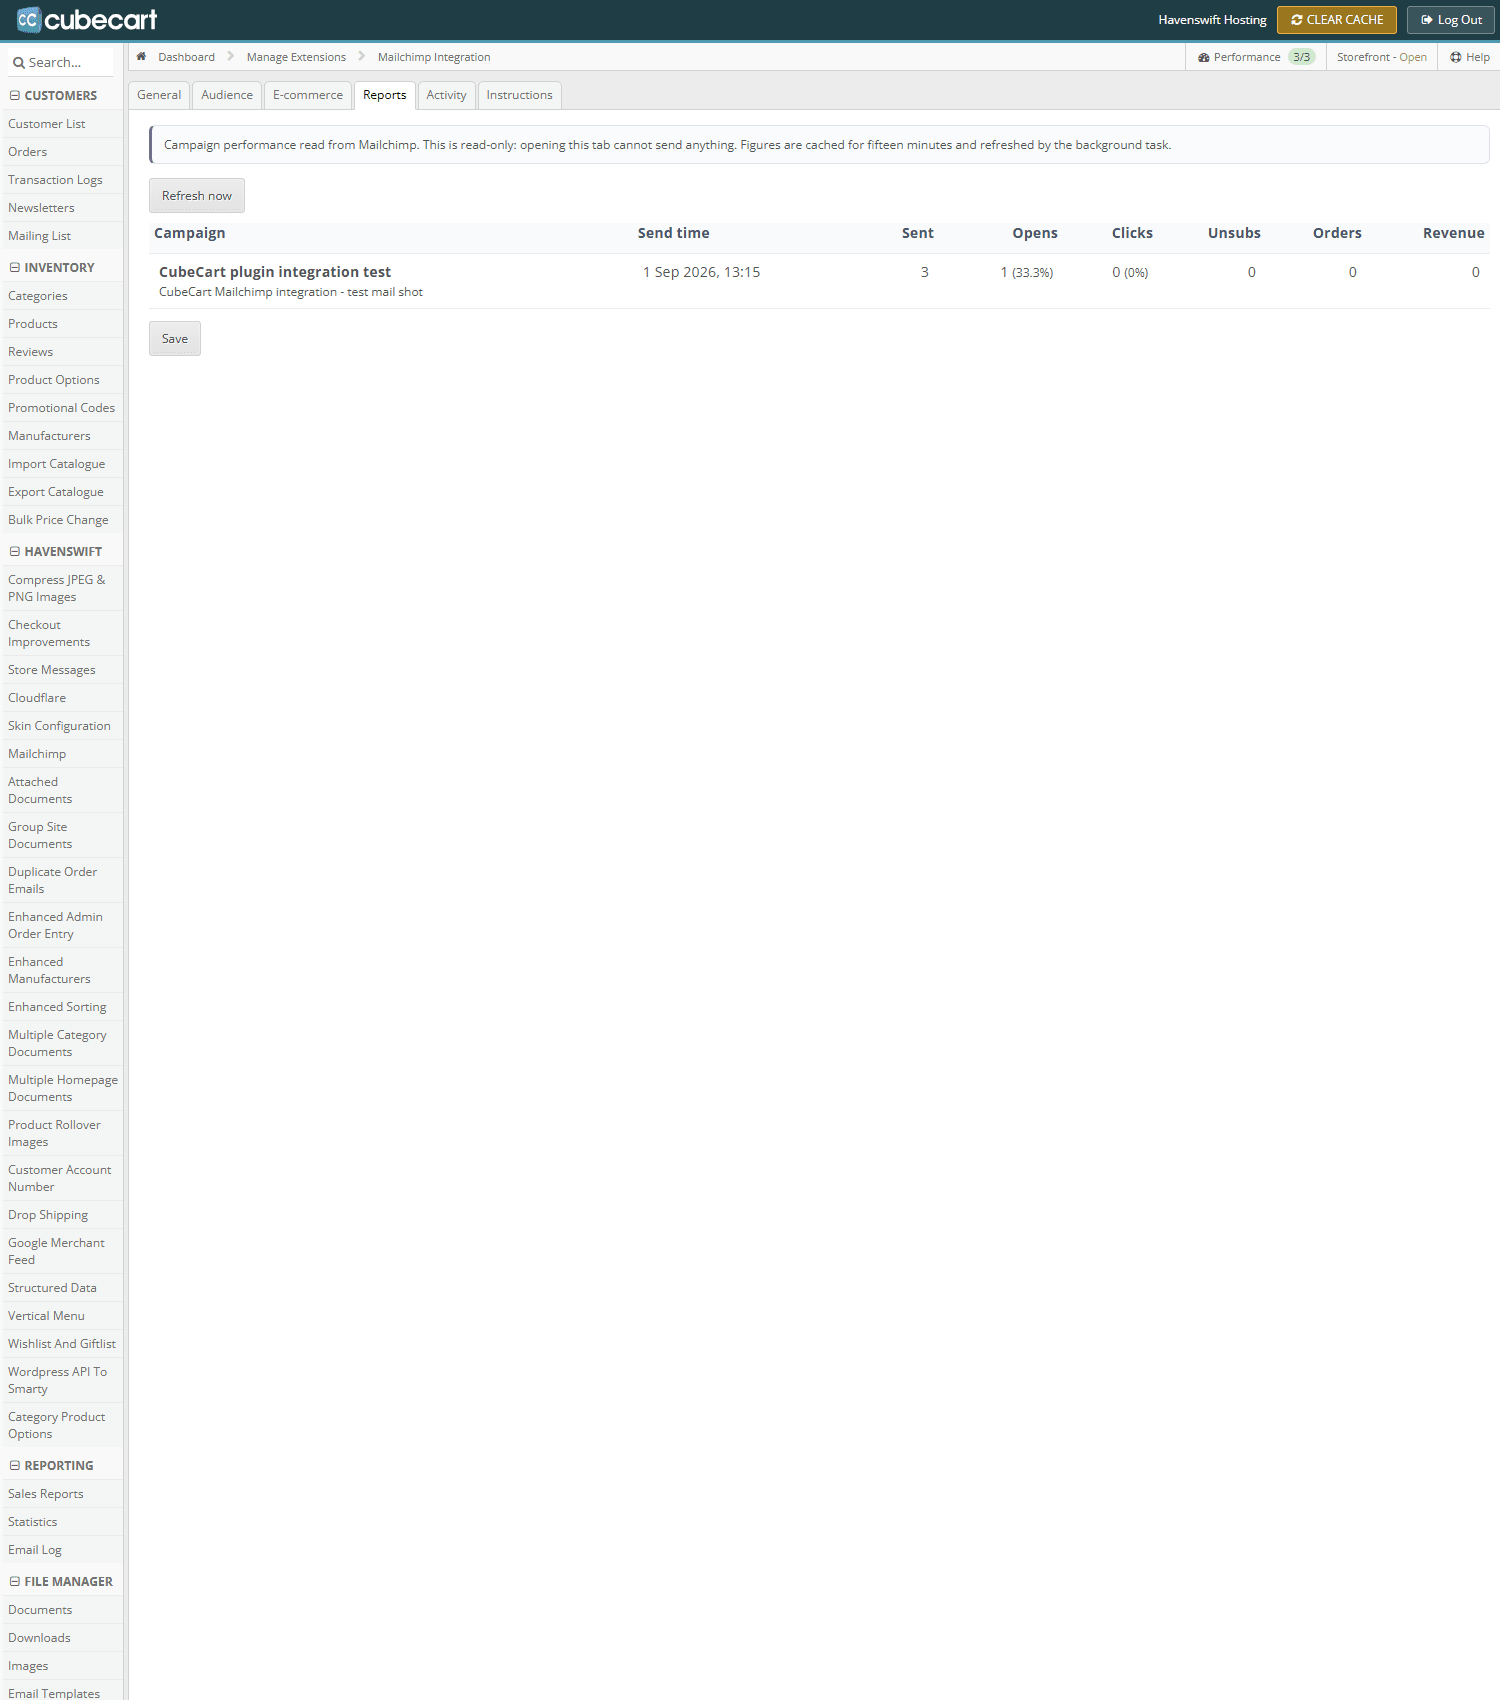
The Reports tab shows how your campaigns performed without leaving your store admin: sends, opens, clicks, unsubscribes, and the orders and revenue attributed to each campaign. Figures are cached briefly, and Refresh reports fetches them again.
Activity, and the queue
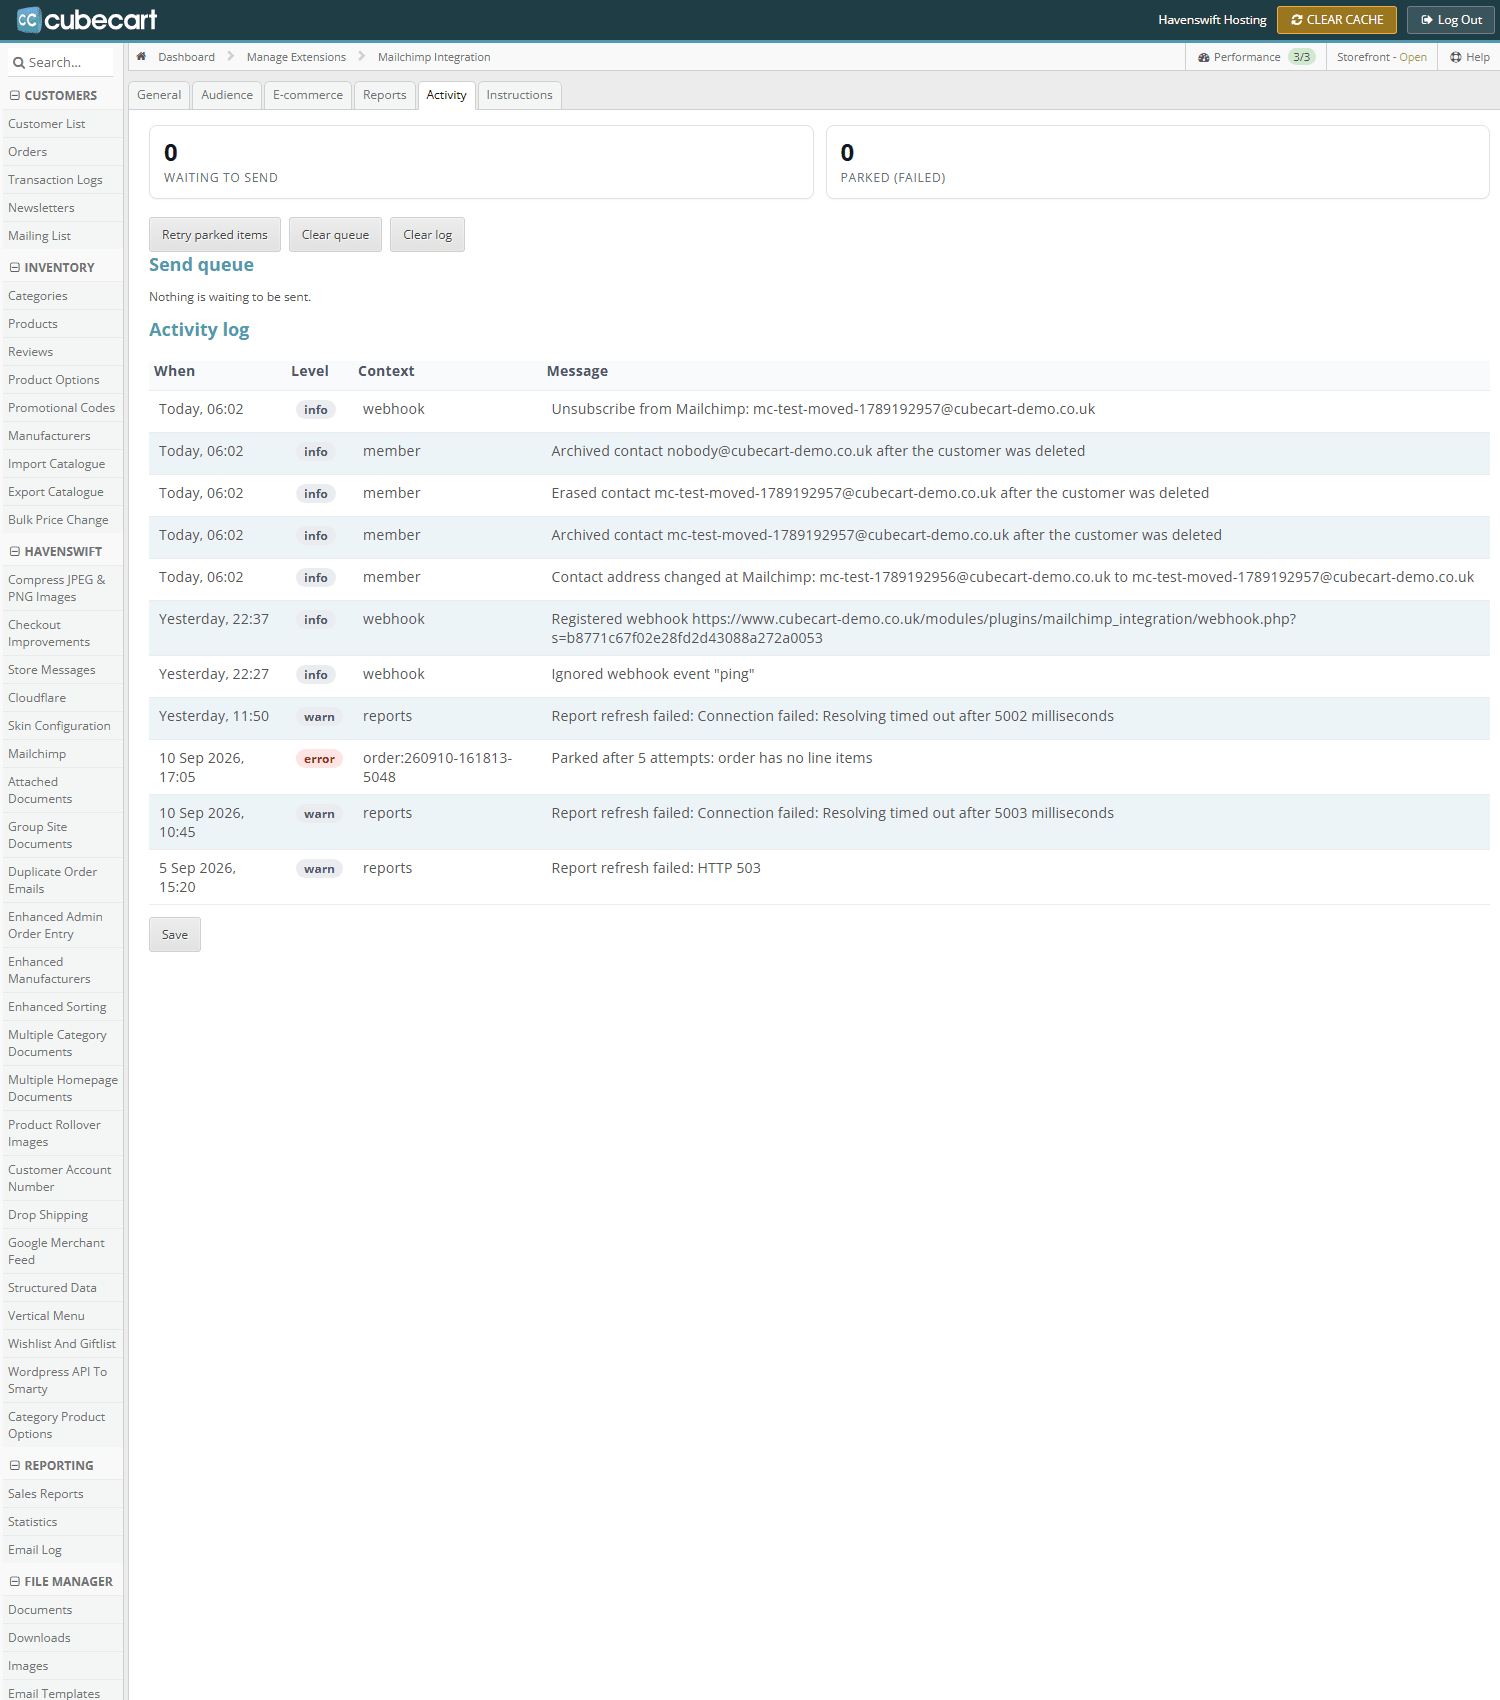
Nothing in your storefront talks to Mailchimp while a customer waits. Each event writes one row to a local queue, and a background task sends it, so a slow or unavailable Mailchimp can never delay or fail a checkout. The Activity tab shows what has been sent, what failed and why, and lets you retry anything parked after repeated failures.
How the sending happens
The plugin registers a task called Mailchimp Sync with CubeCart's own cron scheduler, at Maintenance then Cron, with its own enable toggle, frequency and last result. There is no extra crontab line to add. If items sit in the queue and never go, check that CubeCart's cron is running at all.
Things that clash
- Two abandoned basket systems. CubeCart can send abandoned basket emails itself and so can Mailchimp. With both live the customer gets two emails about one basket. Decide which one owns that message; the plugin warns you when both are on, and never changes the store setting for you.
- A tracking code already in your skin. If your skin already outputs a Mailchimp tracking snippet, you do not want a second one. The plugin warns rather than duplicating it.
- CubeCart's own Mailchimp plugin, as above, is switched off for you.
It never sends email
The plugin keeps data in step and reads reporting. It calls no Mailchimp send, campaign, test or automation endpoint anywhere. Every campaign and automation is created and sent by you, inside Mailchimp, on your own schedule. Your Mailchimp account is yours and nothing in it is shared with us.
Instructions inside the plugin
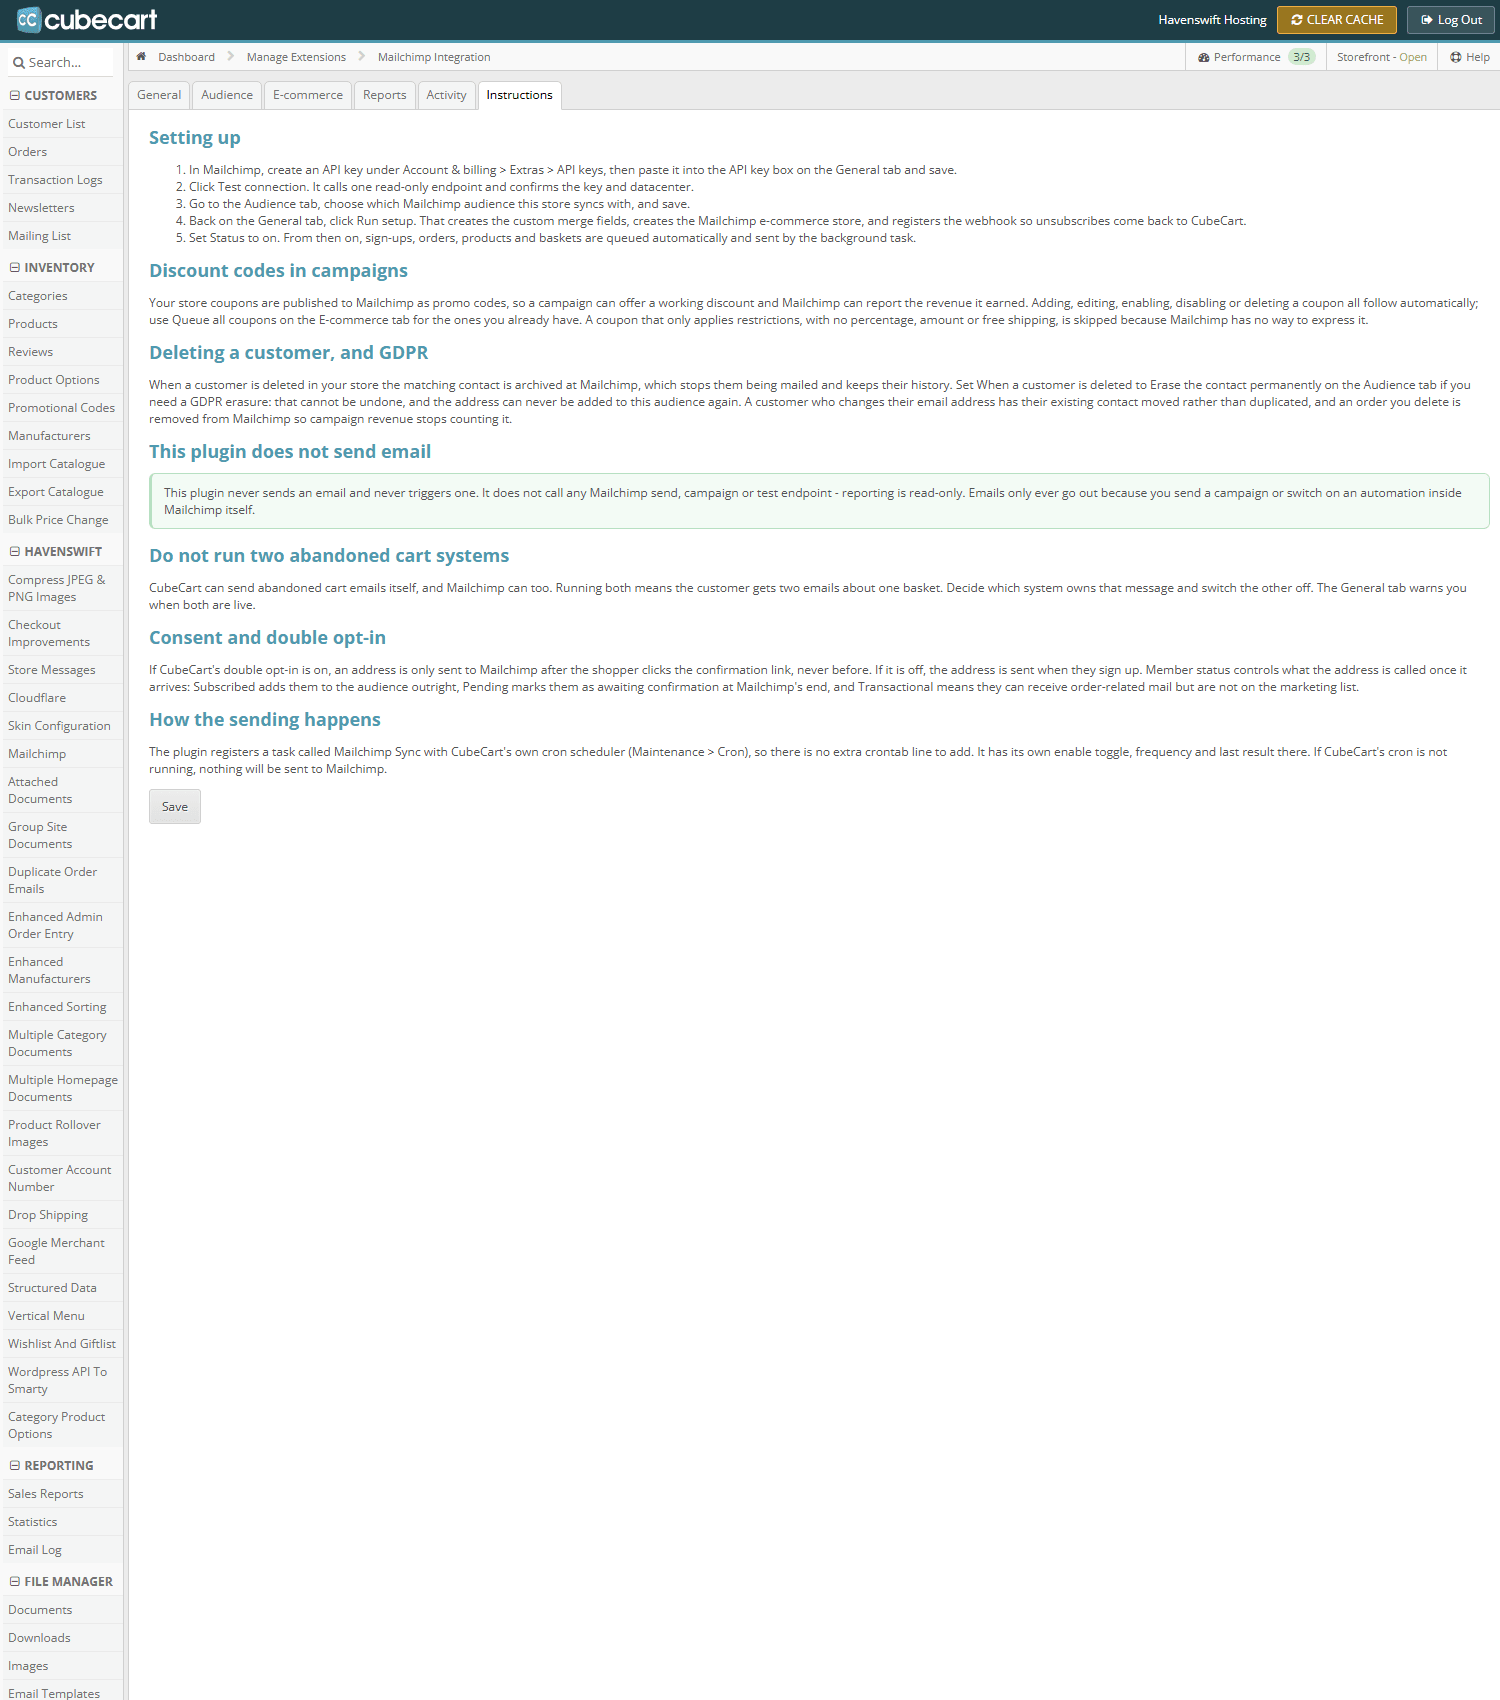
The same guidance is on the plugin's own Instructions tab, so it is available in the admin when you need it.
If something is not syncing
- Check the Activity tab first. A failed item names the reason Mailchimp gave.
- Confirm the licence shows as active on the General tab. An expired or invalid licence stops the sync.
- Confirm CubeCart's cron is running, since the queue is drained by the Mailchimp Sync task.
- Use Test connection to rule out the API key, and check the audience is still selected.
- Mailchimp's free tier caps contacts and sends, and the automations that the e-commerce data feeds are on their paid plans. The data still syncs on the free tier.
If it is still not behaving, open a ticket with your store URL and what you expected to happen, and we will look at the log with you.
